Product Description
Manufacturer Auto Spare Parts Car Suspension parts Electrical parts Body parts Engine parts and Accessories for CHINAMFG Vios Yaris Corolla Fortuner Hilux CHINAMFG Hiace LandCruiser Coster 4Runner Highlander Camryetc.571160070,57110K080,571OK012,GUT12,GU1000,GUT12,GUT10,GUT13,GUT20,GUT25,GUT29,GUT30,GUMZ2,GMUZ3
Product Description
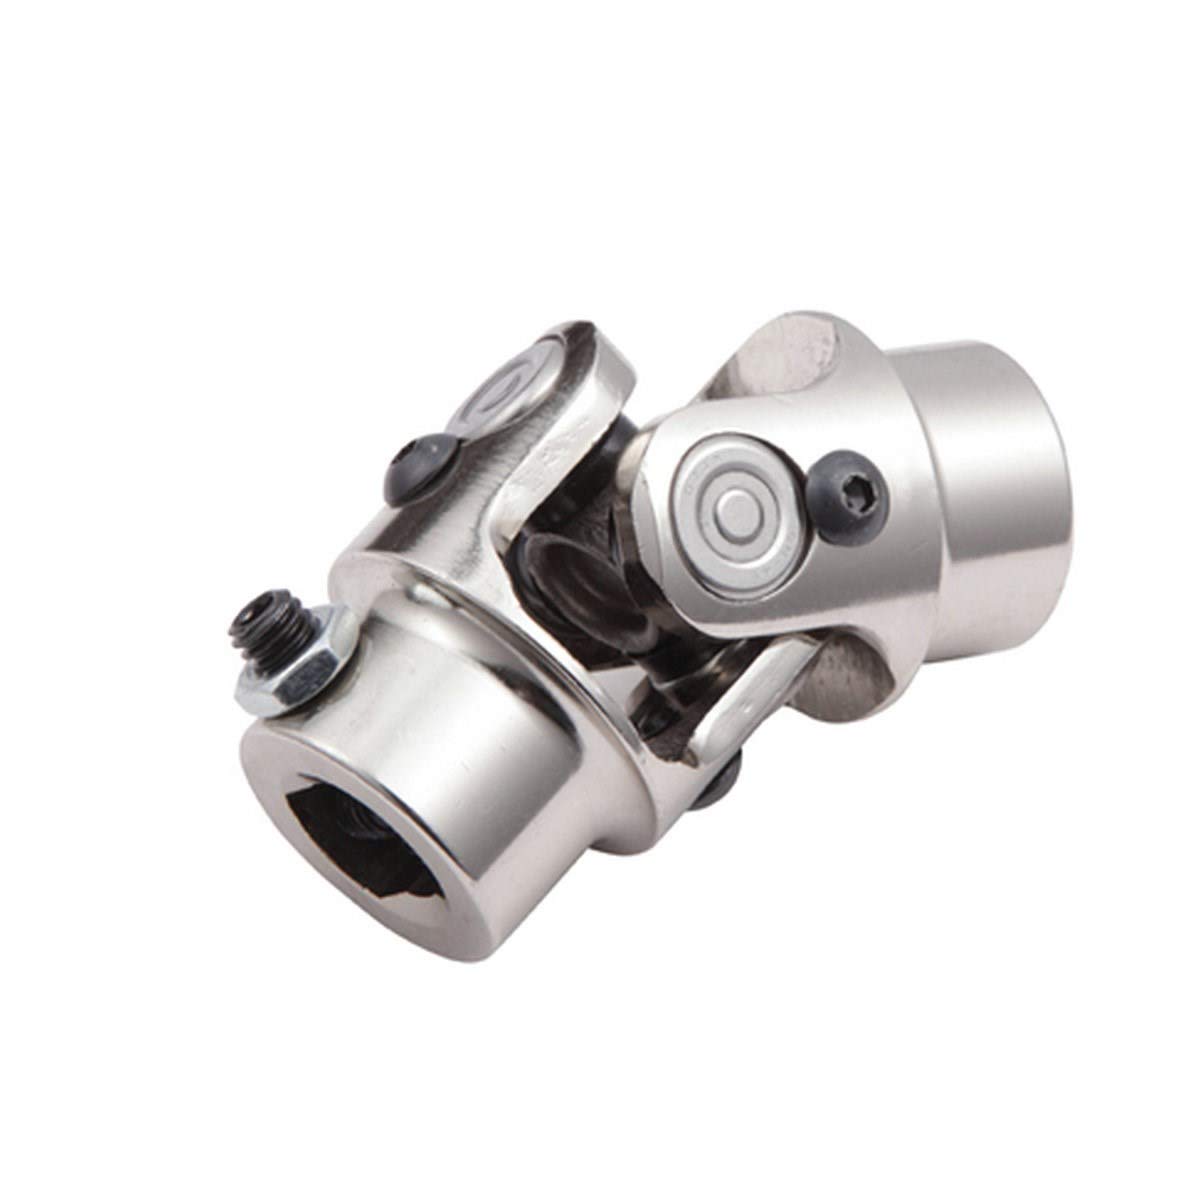
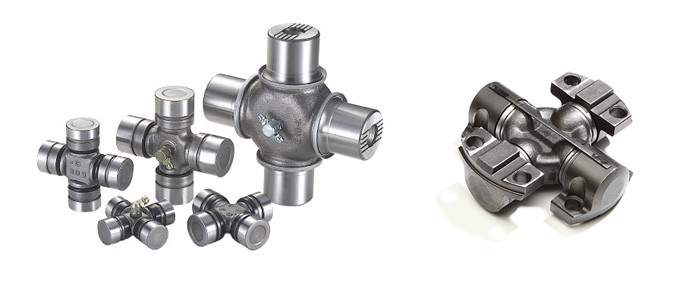
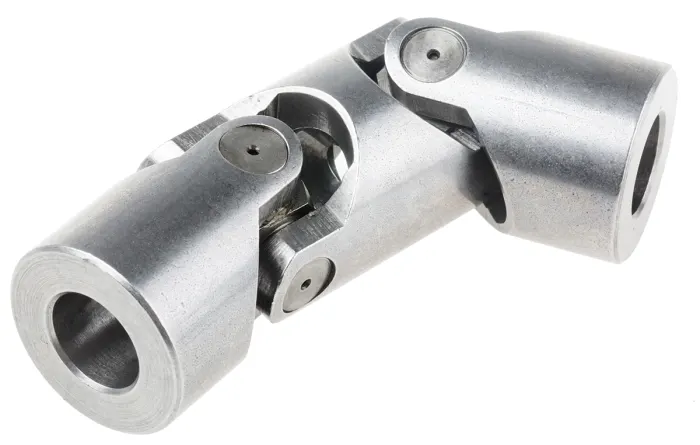
A Universal joint, U-joint, Cross joint, or Cardan joint, is a joint or coupling in a rigid rod that allows the rod to ‘bend’ in any direction, and is commonly used in shafts that transmit rotary motion, is used for transmission systems of cars, buses, trucks, and tractors.
| part name | Universal joint |
| part number | GUMZ-3,0164-25-060 |
| weight | 0.91KG |
| car name | TRUCK T1500,TRUCK T2000 |
| size | 32x57x89mm |
| packing Details | Snap Rings:4pcs,Grease Nipples:1pcs. |
| warranty | 12 Months |
| place of Origin | RuiAn WenZhou ZheJiang |
Product Details:
Product: Universal Joint.
Hardness: HRC58-64.
Brand: LR or OEM service.
Packing: Plastic bag, color/white box, carton, wood pallet.
Sample policy: Free sample, freight collect.
our catalog:
Detailed Photos
other instructions
1>it is FOB HangZhou price . (also can send free to HangZhou HangZhou /ning bo ZheJiang and so on. warehouse .)
2>the material is 20cr good material , must not any complain from your customers. (also have 20Mn . 20cr Mn Ti )
3>our delivery time is 40days (with 20Gp container ) . very in time .
4> Can develop according to customer’s drawings or samples
5> OEM is available
6> Full range for the universal joint
7> Good quality and resonable price
Packaging & Shipping
the packing . Standard netural packing with carton.
Delivery detail: 30-45 working days,depend on the actual produce condition.
Company Profile
HangZhou Chuangbang Locomotive Parts Co., Ltd. is a manufacturer of cross shaft and three-pronged universal joint. The company now has mature production technology, testing equipment and set up R & D, mold development center, quality inspection, sales and other departments, greatly improving the productivity and product quality stability. After years of efforts, the company’s product quality and technology in the forefront of the domestic, and with its intimate after-sales service to win the trust of customers, but also won a good reputation for themselves. After years of hard work and struggle, the company has expanded its business to overseas markets, and has established mutually winning cooperative relations with customers in other foreign markets. As the company name indicates, we are running, innovating, we have been running, constantly innovating! But every time we run, the reason for innovation is because of you!If you need know us, please visit our website.
FAQ
Q1: What is the location of your company?
A1: Our company is located in the TangXia (RuiAn) City ,ZHangZhoug province,China.Welcome to visit our factory at anytime!
Q2: How does your factory do regarding quality control?
A2: Our standard QC system to control quality(TS16949 2016).
Q3: What is your delivery time?
A3: Usually within 30-40 days after the receipt of payment.Delivery time must depend on the actual produce condition.
Q4: What are your strengths?
A4: 1.We are the manufacturer,having competitive advantage in price.
2.A large part of money is put into advancing CNC equipments and product
R&D department annual,the performance of universal joint can be guaranteed.
3.About quality issues or follow-up after-sales service,we report directly to the boss.
Why Choose Us
* Favorable Price For You
* Good Reputation Among The Clients
* Smooth & Easy Cooperation
* Considerate and Responsive Customer Service
* Positive Customer Feedback
* On time and Safe Delivery
* Reliable Partner
* Widely Exported To Lots Of Countries
* Good Quality Guaranteed
Advantages
1) With abundant products in stock, it can be shipped in the same day as order placed.
2) 1 piece price is also the wholesale price. Shipped directly from the factory avoid middlemen to increase prices.
Notice:
*Original equipment manufacturer names, Part number and descriptions are quoted for reference purposes only
/* January 22, 2571 19:08:37 */!function(){function s(e,r){var a,o={};try{e&&e.split(“,”).forEach(function(e,t){e&&(a=e.match(/(.*?):(.*)$/))&&1
| Condition: | New |
|---|---|
| Color: | Silver |
| Certification: | ISO |
| Structure: | Double |
| Material: | Stainless Steel |
| Type: | Retractable |
| Customization: |
Available
| Customized Request |
|---|
How do you ensure proper alignment when connecting a universal joint?
Ensuring proper alignment when connecting a universal joint is essential for its optimal performance and longevity. Here’s a detailed explanation:
Proper alignment of a universal joint involves aligning the input and output shafts to minimize angular misalignment and maintain a smooth and efficient power transfer. Here are the steps to ensure proper alignment:
- Measure shaft angles: Begin by measuring the angles of the input and output shafts that the universal joint will connect. This can be done using a protractor or an angle measuring tool. The angles should be measured in relation to a common reference plane, such as the horizontal or vertical.
- Calculate the operating angle: The operating angle of the universal joint is the difference between the angles of the input and output shafts. This angle determines the amount of angular misalignment that the universal joint needs to accommodate. It is crucial to calculate the operating angle accurately to ensure the proper selection of a universal joint suitable for the application.
- Select the appropriate universal joint: Based on the calculated operating angle, choose a universal joint that is designed to handle the specific misalignment requirements. Universal joints come in various sizes and designs to accommodate different operating angles and torque loads. Refer to the manufacturer’s specifications and guidelines to select the appropriate universal joint for the application.
- Achieve parallel alignment: To ensure proper alignment, it is important to align the input and output shafts so that they are parallel to each other when viewed from the common reference plane. This can be achieved by adjusting the mounting positions of the shafts or using alignment tools such as straightedges or laser alignment systems. The goal is to minimize any offset or skew between the shafts.
- Check centerline alignment: Once the shafts are parallel, it is necessary to check the centerline alignment. This involves verifying that the centerline of the input shaft and the centerline of the output shaft are in line with each other. Misalignment in the centerline can result in additional stress on the universal joint and lead to premature wear or failure. Use measurement tools or visual inspection to ensure the centerline alignment is maintained.
- Securely fasten the universal joint: After achieving proper alignment, securely fasten the universal joint to the input and output shafts according to the manufacturer’s recommendations. Follow the specified torque values for the fasteners to ensure proper clamping force without over-tightening. This will help maintain the alignment during operation.
- Perform regular maintenance: To ensure continued proper alignment, it is important to perform regular maintenance, including periodic inspections and lubrication of the universal joint. Regular maintenance can help detect any misalignment or wear issues early on and prevent further damage or failure.
By following these steps and paying attention to proper alignment, the universal joint can operate smoothly and effectively, minimizing stress, wear, and the risk of premature failure.
In summary, ensuring proper alignment when connecting a universal joint involves measuring shaft angles, calculating the operating angle, selecting the appropriate universal joint, achieving parallel alignment, checking centerline alignment, securely fastening the joint, and performing regular maintenance.
What are the signs of a failing universal joint and how do you diagnose it?
Diagnosing a failing universal joint involves identifying specific signs and symptoms that indicate potential problems. Here’s a detailed explanation:
A failing universal joint can exhibit several signs that indicate a need for inspection, repair, or replacement. Some common signs of a failing universal joint include:
- Clunking or Knocking Noise: One of the most noticeable signs is a clunking or knocking noise coming from the universal joint area. This noise is often more pronounced during acceleration, deceleration, or when changing gears. The noise may indicate excessive play or wear in the joint’s components.
- Vibration: A failing universal joint can cause vibrations that are felt throughout the vehicle. These vibrations may be more noticeable at higher speeds or under load conditions. The vibrations can be a result of imbalanced driveshafts or misaligned yokes due to worn or damaged universal joint bearings.
- Difficulty in Power Transfer: As a universal joint deteriorates, power transfer from the transmission to the driven wheels may become less efficient. This can lead to a decrease in acceleration, reduced towing capacity, or difficulty in maintaining consistent speed. Loss of power transfer efficiency can occur due to worn or seized universal joint components.
- Visible Wear or Damage: A visual inspection of the universal joint can reveal signs of wear or damage. Look for excessive play or movement in the joint, rust or corrosion on the components, cracked or broken yokes, or worn-out bearings. Any visible signs of damage indicate a potential issue with the universal joint.
- Grease Leakage: Universal joints are typically lubricated with grease to reduce friction and wear. If you notice grease leakage around the joint or on the surrounding components, it may indicate a failing seal or a damaged bearing, which can lead to joint failure.
To diagnose a failing universal joint, the following steps can be taken:
- Perform a visual inspection: Inspect the universal joint and surrounding components for any visible signs of wear, damage, or leakage. Pay attention to the condition of the yokes, bearings, seals, and grease fittings.
- Check for excessive play: While the vehicle is on a level surface and the parking brake is engaged, attempt to move the driveshaft back and forth. Excessive play or movement in the universal joint indicates wear or looseness.
- Listen for abnormal noises: During a test drive, listen for any clunking, knocking, or unusual noises coming from the universal joint area. Pay attention to noise changes during acceleration, deceleration, and gear changes.
- Monitor vibrations: Note any vibrations felt through the vehicle, especially at higher speeds or under load conditions. Excessive vibrations can indicate problems with the universal joint or driveshaft.
- Seek professional inspection: If you suspect a failing universal joint but are uncertain about the diagnosis, it’s recommended to consult a professional mechanic or technician with experience in drivetrain systems. They can perform a comprehensive inspection, including measurements and specialized tests, to accurately diagnose the condition of the universal joint.
It’s important to address any signs of a failing universal joint promptly to avoid further damage, drivability issues, or potential safety hazards. Regular maintenance, including periodic inspection and lubrication, can help prevent premature universal joint failure.
In summary, signs of a failing universal joint include clunking or knocking noises, vibrations, difficulty in power transfer, visible wear or damage, and grease leakage. Diagnosing a failing universal joint involves visual inspection, checking for excessive play, listening for abnormal noises, monitoring vibrations, and seeking professional inspection when necessary.
How do you install a universal joint?
Installing a universal joint correctly is essential to ensure its proper functioning and longevity. Here are the general steps to guide you in the installation process:
- Prepare the universal joint: Before installation, inspect the universal joint for any damage or defects. Ensure that all the components, such as yokes, bearings, and cross, are in good condition. Clean the components if necessary and apply a suitable lubricant to ensure smooth operation.
- Align the shafts: Position the shafts that need to be connected by the universal joint. Align the shafts as closely as possible, ensuring that they are parallel and collinear. If precise alignment is challenging, universal joints can compensate for slight misalignments, but it is still preferable to have the shafts as aligned as possible.
- Insert the cross: Insert the cross-shaped center piece of the universal joint into one of the yokes. Ensure that the cross is aligned properly with the yoke and that the bearings are securely seated in the yoke bores.
- Attach the second yoke: Slide the second yoke onto the cross, aligning it with the opposite ends of the cross arms. Make sure the yoke is oriented in the correct phase with the first yoke, typically 90 degrees out of phase, allowing for angular displacement.
- Secure the yokes: Use the appropriate fastening method to secure the yokes to the shafts. This can include methods such as set screws, clamps, or retaining rings. Follow the manufacturer’s guidelines and torque specifications for the specific type of universal joint being installed.
- Check for smooth operation: After securing the yokes, rotate the connected shafts by hand to check for smooth operation and proper articulation. Ensure that the universal joint moves freely without binding or excessive play. If any issues are detected, double-check the alignment, lubrication, and fastening of the universal joint.
- Test under load: If applicable, test the universal joint under the expected load conditions of your application. Monitor its performance and check for any abnormal vibrations, noises, or excessive heat. If any issues arise, re-evaluate the installation and make necessary adjustments or consult with an expert.
- Maintenance and lubrication: Regularly inspect and maintain the universal joint as part of your overall system maintenance. Ensure that the joint remains properly lubricated according to the manufacturer’s recommendations. Lubrication helps reduce friction, wear, and heat generation, extending the life of the universal joint.
It’s important to note that the installation process may vary depending on the specific type and design of the universal joint, as well as the application requirements. Always refer to the manufacturer’s instructions and guidelines for the particular universal joint you are installing, as they may provide specific procedures and considerations.


editor by CX 2024-04-02